It
has been such a long time since I posted up anything game related. Lately it
has all been about work, work and work. Finally, there are some interesting
videos to show you.
Also,
I have been lately watching a lot of fighting game videos. Being an FPS and RPG
fan boy, I shunned a lot of fighting games. But recently, I am beginning to love
it.
There’s this guy by the name of miles923 on youtube who
does mainly fighting game tutorials. I’ve been watching
mainly his ultimate marvel vs capcom videos and with Street Fighter X Tekken
coming out soon, he has already given tips and tutorials on how to play it.
Final week of 3D Visualization and Animation is here!
Our assignment was to do a walk cycle of a human body. It has to be accurate and imitate to that of a real human body. Thinking about it, I must think a lot of things when walking; how our hands, legs, body and spine move. We naturally cannot keep a straight spinal line so it is bent forward a lot of times. Our hands would sometimes move inward when walking (unlike my animation which just show my hands moving forward and backward when walking).
Thinking of the body when it moves, it moves down when the leg touches the floor and moves up when the other leg is going to touch the floor. It's hard to explain so here is my video and the references I used for my assignment.
References:
See what I mean. The fourth pose is at the highest when the left leg is about to touch the ground while the right is pushing up the body.
Reflection:
I guess what I learned during this assignment is that there is no easy way out and attention to detail is very important.
For the first part, I had to manually move the person's legs and body constantly at every frame. Although it is very time consuming, I get better at doing it. After a few adjustments, I know where the legs and the body positions should be.
Motion trails are a great way to see where the body positions are. I did all the objects manually so there are bound to be some mistakes so I used the motion trail to adjust further.
So this week's exercise is about animation and animating a living object is harder than that of an in-animatie object.
This is spider man's weight shift: Moving his hips.
About the texture, when I transferred the one I did in school with the texture and I transferred it to my laptop, it was unable to give me the skin texture. But what's more important is that you see the animation of the hip mainly (swaying from right to left). So here it is.
Reflection
What I learned is that poses are known as extremes. Bending the pose too much will be too extreme so there is a limit to it. There must be ease in and ease out of each action. Living things are not robots so we cannot do every action smoothly. There must be some actions we do very fast and very slow.
Another thing I learned is anticipation. When we do actions, others should anticipate what we are about to do. For example, the spider man weight shift. The feet are facing a certain direction when the weight is exerted on 1 foot. When the weight changes to the other leg, the feet changes direction accordingly. 1 foot will relax while the other will try to take the weight of the body.
Big Dog
We are supposed to animate this dog when it is falling down. What the movements and actions it is doing when it is falling down and how it managed to get up.
Exercise 1:
i)If engineered or programmed badly, BigDog would
fall over. Watch the full video again, and describe how BigDog’s legs move
while walking– ie. what is the sequence of leg movements for one complete step?
Use the terms BL, BR, FL, and FR for the back-left, back-right, front-left and
front-right legs.
Ans: One step: Front-left lifts up
while back-right moves forward -> Front-right lifts up while back-left moves
forward -> *repeats*
ii)Explain how this sequence of movements manages
to balance BigDog’s body weight.
Ans: This
sequence of movements helps because the center of gravity is kept in the center
of the dog. If the front left and front right were to move forward at the same
time, the center would be near the head and that would probably destabilize the
dog.
iii)Look at BigDog_kick_slow_motion.mov. Draw a
storyboard of BigDog stabilising itself after being kicked.
Exercise 2:
So this is my playblast aka my video of the big dog animation.
My thoughts:
This is about watching the original video very carefully and then applying it to the rig. The thing I struggle is that when I animate, I keep the number of frames at a constant number like 1 movement equals to 12 frames. Well, in animation, I have to be flexible and change the number of frames and cannot keep it at a constant number.
Watching the original video, it is quite hard to get the directions properly. When it spreads it's front legs, the body must face down and when it's back legs are spread out, the body must face up, giving the "dog" a bounce and some life; unlike when the body is just moving left constantly without rotating anything.
I had to ease out the animation as well. My previous animation showed the dog in its standing up position at the last frame without giving it extra frames for easing out so I added that.
Another thing is that in the graph editor, when rotating and translating, most of the lines cannot be straight. There must be some sort of bend to make it look more exciting.
As
part of our assignment as well, we had to create an original character,
drawing some facial features and creating a back story for our
character. The most interesting is to create the type of character he
is. Is he calm and cool? Overconfident and cocky? Highly sarcastic and
proud?
In the end, I chose evil and crazy. You will see what I'm talking about. Here are my character references.
This is zancrow from the anime: Fairy tail. Look at how scary looking he is.
This is another one from fairy tail; Gajeel.
This is Zaraki Kenpachi from the anime: Bleach. There are many
characters in the anime but he is the only one with an evil smile all
the time. He is actually good but looks evil.
This one is Alucard from the anime: Hellsing Ultimate. He is the most
powerful protagonist ever and he is evil but also good in nature.
So these are my character references.
Head design Sketches
Here are some initial and face sketches of my character
I'm
not really good at drawing HUMAN proportions without an image to refer
to. I specifically do not like the last image (the one right above)
because from other images, I can draw perspective images of my
characterer instead of side and front ones.
I
made 1 error when drawing the front and side views. I drew the lines
first to roughly pinpoint where the eyes, nose, mouth and chin were. And
it turned out horrible. So I drew the front view first, then moved on
to drawing the lines and the side view.
Next week, I will probably do the poses for him and the character background for him.
I already thought of a name: Malkrath!
Body design
Here are some referenced poses from the 4 characters.
See how the 2 poses above look very identical, indicating a very overconfident, powerful character.
The last two above were my inspiration for my character. The 2 poses are from Ryu Hayabusa from Ninja Gaiden 2.
Body design Sketches
Now are my sketches of the body poses.
I am still not good at drawing my human characters so I use reference. Some I come up on my own.
Since pictures do not describe much of my character, here are some insight as to the background of my character.
Characterization
1. Fill in these basic details:
NAME, TAGLINE, and a BRIEF
INTRODUCTION to your character.
Malkrath.
“I’m looking for a real fight! Not
from some dog shit.”
Malkrath is part of a group whom they
named themselves: Immortell. He is 1 of the 10 core group members who desires
battles and blood. When he was young, he witnessed his parent’s death infront
of him. The person who founded the group took Malkrath under his care and
trained him under his guidance. With self training as well, he has become a
force to reckon with and he believes that nobody in the world is superior to
him. He has faced many challenges; assassin’s sent by the one responsible for
his parent’s death and has overcome them all in blood.
2. All characters are created for a purpose.
This purpose is to tell a story. Briefly describe the story that your character
takes part in. You don’t need to go into great detail.
A young man has made a
name for himself in the world of magic. He has witnessed his parent’s death at
a young age and has taken it up upon himself to surpass his weak self and turn
himself into the most powerful magic sword wielder in the world. Initiating
into a group called “Immortell”, under the person he looked after him when his
parent’s were killed; he strove hard and sparred everyday to become the best.
He has killed many to get to where he is and will continue to do so to find out
his parent’s murderer. His name: Malkrath.
3. What is the driving force of your character
– what motivates them? This gives a key to their character. Darth Vader is
motivated by his desire to crush the Rebel Alliance, while Jack Bauer is
motivated to protect his country from whatever dangers threaten it.
Malkrath is driven by his blood lust
and seeks only to fight the strongest of the strongest. And deep down in his
heart, he also wants to find his parent’s murderer.
4. What traits are unique to your character –
in other words, what makes them different, and stand out from, all other
characters that have ever been created? Give at least 3 appearance-based
trailts, and 3 behavioural traits. For
Appearance:
1) Malkrath’s most noticeable
feature is his evil grin that never goes away.
2) Another feature is his scar
on his face that crosses his left eye.
Behaviour:
1) Malkrath is always ready
and willing to get involved in any fight so he jumps in relentlessly and let
his body and reflexes take care of the rest.
2) He walks with
overconfidence and zealousness. He believes to be one of the most powerful magic
/ equip users ever and in actual fact, he is.
3) He serves no one, other
than the man who saved him when he was a young boy. He looks down on a lot of
people but treats his group with respect they deserves for they are as powerful
as he is.
5. Write a short dialogue sequence between your
character and another person. The dialogue should illuminate some part of your
character’s personality.
(Malkrath walks along a road
and is ambushed by another magic group, “Cyrans”)
Cyran
Leader: “We have to kill you, Malkrath! Under our master’s orders!”
(20
people charge in and fighting ensues)
(5
minutes later)
Cyran
Leader: “*panting* How is it possible? You have not a scratch.”
Malkrath:
“Is that all? Is that all your pathetic group’s got? Your “ambush” attack was
merely a warmup!”
(Malkrath
takes his sword and stabs him mercilessly)
Continuing on the rigging exercise video tutorials, I have finally done my rig of the female body.
First thing is the reverse foot lock.
Following the powerpoint slides, I was able to do this reverse foot lock.
1 thing I learned through this was an error that halted my progress. I could not pole vector the ikHandle of the leg with the sphere that was the control for the knee. Apparently, the video did not point out that the leg ikHandle had to an RPsolver, not SC. With an RP (Rotation Plane), I could pole vector the two items. Other than that, creating joints and ikHandles are quite easy.
Next is my rig and a few other poses.
Finally, after all the video tutorials, I have completed my rig.
I will say I have quite a number of things. Checking the rotation axis on each joint and snapping the center pivot to the specific joints so that when moved, we can click on the joint itself instead of it's default 0,0 value. Adding attributes and setting keys are new things I learned as well because it can limit how much one's finger should move. I could set the maximum and minimum range for the fingers if I so please. Another thing I learned is that naming components and grouping them properly is very important. 1 small mistake could lead to disaster.
I will say the rig is not perfect. I encountered few problems. The foot control could not rotate. It only could move in the move tool. Rotating will only rotate the foot control, not the foot itself. Same problem with the hands; could not rotate it, just move it. The elbow and the knee controls work fine. The hip control does not work as well. It can't move or rotate. It's just there for show.
This is not a good rig; it is my rig. So creating poses from my rig is not easy. Here are some which I tried to fit.
Last week was me doing the rigging poses. Now I actually have to construct a rig from start.
Here are some lessons.
I have to rotate the arms (above) towards me to fit the rigging criteria.
I twisted the hand like so. See how all the vertices have been awkwardly rotated.
I then selected the faces and deleted them.
Once I deleted the faces, I press for vertices and move the arm closer to the hand. I click on the merge vertices to merge the arm to the hand.
This is how I straightened out the arms.
By following the video tutorials so far, I can pretty much do what the guy does on the video. Making a skeleton on a body is easy because it's just connecting joints on the body. The problem is that you must know how many joints are there. For example, the body. There is the neck, the collar and the spinal cord. I also have to know the names of these to put them in the correct order in the hypergraph so that they can be grouped properly.
When new joints are created, all their rotational axis are in disarray. I guess when rotating the body, some joints would rotate elsewhere and that is why they must follow some specific directions.
Some errors occured like some joints would not orient themselves. The video tutorial showed "click on NONE in the orientation section" but 2012 does not have none. I fixed it by simple rotating it properly using the rotation tool.
There is 1 part where the person shows the centre pivot is at 0, 0 when he clicked the joint locations. So he said "press insert key and it will snap to the joint". It's not working for me thus far. I'm trying other methods. If you (I mean THE TEACHER) can read, how do you solve this?
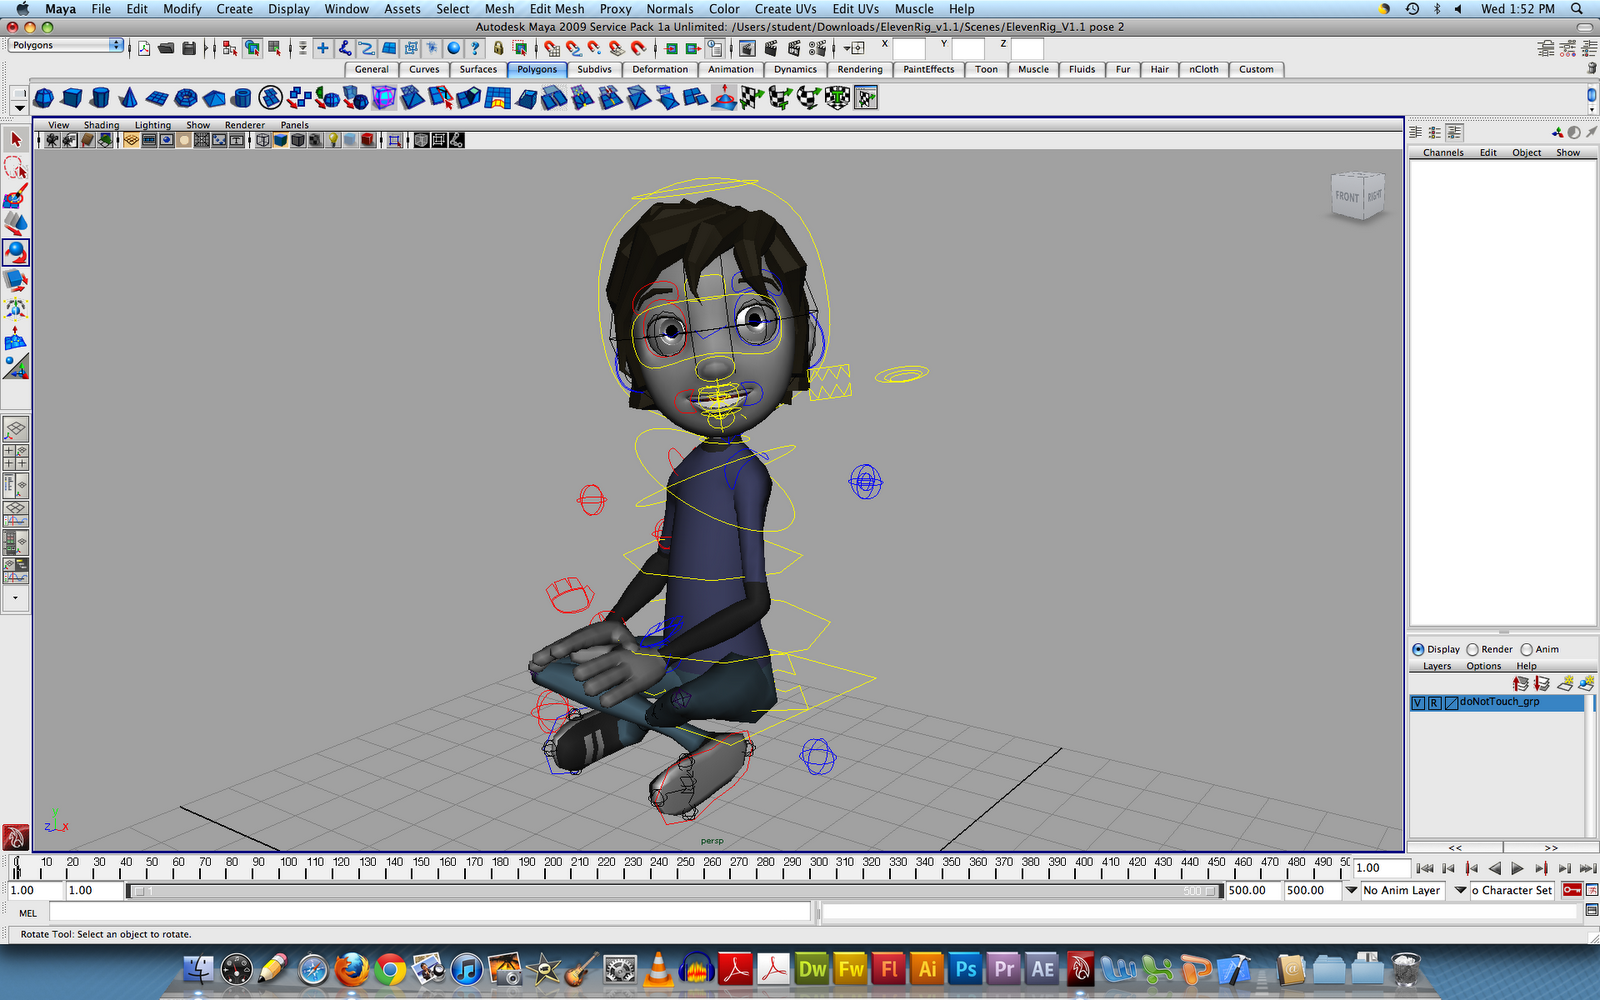
There were other works we had to do and it involved also looking at the human body and placing it as the image shows.
Here is the first:
Although I wonder who can create a perfect recreation of the picture, I think it looks almost exactly identical (except for the fingers which I just realized is able to move). Getting the legs to cross perfectly also took time because the adjustments and the proportion of the leg and knee had to move more drastically.
Here are the ones I adjusted (especially the fingers).
The one major thing I adjusted were the fingers. Given the picture, I could adjust the fingers properly to bend it. For fingers, there were 4 parts to it. The main finger and the three joints. I cannot just select all and rotate it. I must rotate each individual joint. It's time consuming but worth it. To make it more realistic, I added a card for the model to hold. Then I just adjusted the fingers accordingly.
Another thing I learned was the eyebrows. I could adjust to make the model to more life like. So far, I could only know how to do the confused look which is to drag the eyebrow downwards. Other than that, the eyebrows need not be adjusted I think.
The second
This one was not that difficult. Again, I will move the fingers so expect this blog to be updated soon. And again, I believe it looks almost identical. I guess the weirdest part about putting this together is the legs. If you look at the legs alone, it seems as though it was for a character that is facing BACKWARDS. The knee rig is a bit sensitive.
Here is the ones I adjusted:
I think it looks better than the one I did originally because I adjusted the fingers and formed a fist. I placed the fists at the hips and it almost looks like the original.
Another I learned is to always adjust the hip. It can never stay the same way as the body, even as it bends sideways.
And the Third
This one was tough. I could not actually see the boy's right hand properly so I had to imagine being in that position and figuring out what his right hand position would be. So I imagined it being like that of his left hand; getting ready to dribble the ball to and fro his left and right hand. I'm guessing my teacher will have somethings to say but first, I should do up the fingers and adjust properly (which will take up a lot of time).
Here are the adjusted ones:
The fingers were of course adjusted. They were spread out evenly so that it can grab the ball. The fingers cannot be too close together. A normal human could not hold a basketball with the fingers so close to one another.
I adjusted the eyes a bit to make him actually look at the ball. This way, it won't look like he is looking at something further away.